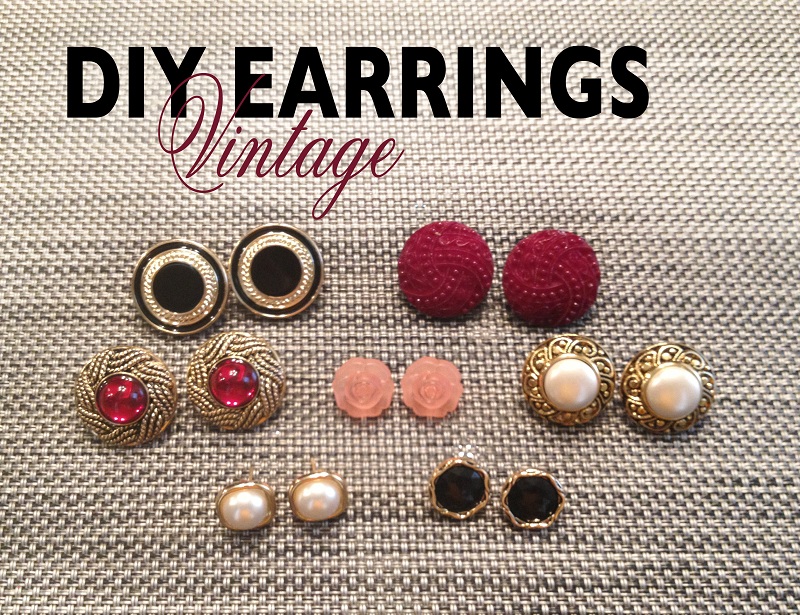
You'll need: Earring stud/post findings and backs, assorted small pretty things, superglue. Paper towel, newspaper and gloves are useful too (not pictured). 2 min + setting time.
1. Select some pretty things.
2. Turn them upside down.
3. Apply glue.
4. Apply posts.
It will depend on the glue how long it takes to set.
Once it's set it's ready to wear!
You can use anything to make these with - beads, flat back gems, buttons, sequins, coins, paper, ribbons etc etc.
You can get post findings in a range of different sizes and styles. The posts will hold better when you match the size and weight of the object to the size of the post's head. Wearing larger backings will also help with bigger, heavier earrings. You can also purchase posts with cone shaped heads that make it easier to attach round objects to (such as beads).
Posts are easily available from most craft shops, online jewellery supply stores and ebay too (there are some links to these sites in my links tab). I buy surgical steel as I have a slight sensitivity to cheaper metals. You can also purchase sterling silver and gold filled posts but these tend to be a lot more expensive (much more expensive than silver/gold hooks). I pay about $2 for 12 pairs of surgical steel.
The glue I used here is called Ultimate Glue by Crafter's Pick and it's a non-toxic, water-soluble superglue. I have only had it a week or so but it seems to be holding well. Here are some other glues that would work :
Remember to use gloves and work in a ventilated area when using these glues.
Glue guns can work well too.
Here are a few similar DIYs to mine. These are both really great blogs, lots of fun DIY ideas here!
Vintage Button Earrings
These earrings are so gorgeous! I absolutely love the idea of using vintage style buttons to make earrings with.
Rose Chabochon Earrings
These are a super pretty and popular style of earring. This is a really great DIY! Love the tip of using styrofoam to dry the earrings overnight in.


that is super clever. I love it !!!!!!!!!!!
ReplyDeleteAdorable! I recently made some dangly earrings out of random things I found at a craft store. Can't wait to try some posts too! Also, I love how you break down your tutorials. I'm fairly crafty challenged, but you make me feel like I can actually accomplish these things! =)
ReplyDeleteOh great! Thanks all. Yes you must give this a go - it’s way too easy this one– kind of addictive too. You’ll probably end up with a lot of earrings :)
DeleteThanks for visiting me! Love these tutorials!
ReplyDeleteHey, I just bought a whole bunch of supplies to make these and started putting them together, but the flat part of the backing is breaking off when i put the earnut on the post. Any suggestions on how to stop breaking them and how to fix the broken ones?
ReplyDeleteHi! Sorry I just saw this!! I changed my blog address over and I keep forgetting to check back on this site.
DeleteSorry to hear your having this trouble. This happened to me quite a bit when I started making them. The trick is to match the size of the flat post back to the size of item your glueing it onto. You should be able to get the flat part of the posts in a range of sizes - I'm using quite large ones in this tutorial - if you see in the picture they cover most of the gem back.
Also what glue are you using??? I really only have had success with superglues or specific jewellery/metal glues. I know some people use glue guns but I find this isn't strong enough. You may need quite a bit of glue too - and also make sure you leave it to dry really well.
I think making sure the size is right is your best bet - and all the surfaces are flat??
The ones I made here I actually tried to break afterwards as I wanted to use the posts for some other earrings - but they are were way to strong for me!
Hope that helps. Let me know how you get on :)
I think this is an informative post and it is very beneficial and knowledgeable. Therefore, I would like to thank you for the endeavors that you have made in writing this article. All the content is absolutely well-researched. Thanks... 로투스 공식사이트
ReplyDeleteLove it this!! So adorable! 토토사이트추천
ReplyDeleteVery clever indeed!
ReplyDeleteHigh quality Window Cleaning in Toronto
Highrise Window Cleaning in Toronto
Commercial Window Cleaning in Toronto
Residential Window Cleaning in Toronto
Thanks for picking out the time to discuss this, I feel great about it and love studying more on this topic. It is extremely helpful for me. Thanks for such a valuable help again. wm
ReplyDeleteI am happy to find your distinguished way of writing the post. Now you make it easy for me to understand and implement the concept. Thank you for the post. บาคาร่า
ReplyDeleteThanks, that was a really cool read! เล่นบาคาร่า
ReplyDelete